Comprehensive Guide to Setting Up Your AR-15
Setting up your AR - 15 out of the box

NOTE: This guide presumes you have read my Quick Guide to Gearing Up your rifle.
Setting up your AR-15 correctly is essential for extracting maximum performance from the platform.
Before we start: if you would like to support this free publication, consider buying a paid subscription of buying me a coffee. This supports the publication and helps me to create more free content for you guys.
Getting back to setting up your AR.
1. Length of pull
One of the first adjustments you should consider. Length of pull refers to the distance from the trigger to the end of the stock.
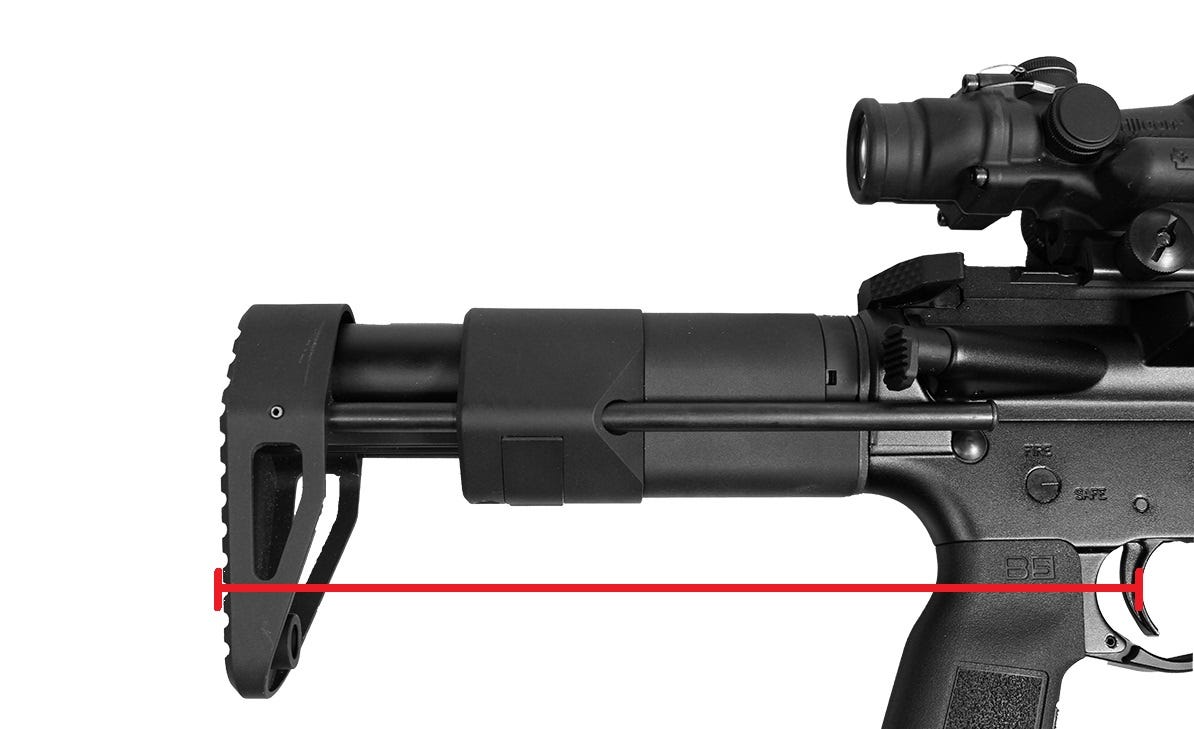
A properly adjusted length of pull ensures a comfortable and repeatable cheek weld, which is crucial for quick and accurate sight alignment.
Some will argue that a shorter length of pull is preferred for close-quarters engagements to enhance maneuverability, while slightly longer settings can provide additional stability for precision shooting.
Personally, I keep the same length of pull regardless of engagement range.
Keep in mind that if you’re wearing body armor or gear, you may need to shorten the LOP to prevent interference.
Steps for setting up an optimal length of pull.
1. Take your rifle and bend your dominant arm in the elbow so it’s at approximately 90 degrees (think showing off your bicep) and the rifle is pointing up. Adjust the buttstock so that it is touching your bicep while your arm is at 90 degrees.
2. Shorten the buttstock by one click. This provides a good starting point, but adjust further as necessary.
Red dot placement
Proper positioning of your red dot or optic is equally important.
The optic should be mounted on the upper receiver rail, positioned far enough forward to allow a wide field of view without compromising clarity.
Avoid mounting the optic on the handguard, as rail flex can cause a shift in zero.
If you want, you can ensure the optic aligns with your iron sights, whether in an absolute or lower 1/3 cowitness configuration. I personally run a 1/3 red dot hight with iron sights removed.
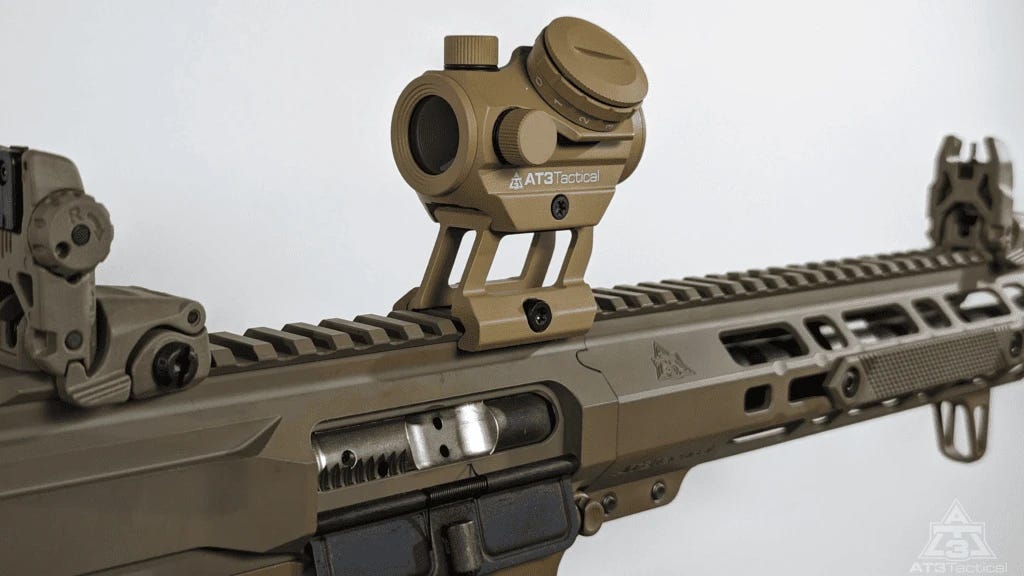
I’m not a big fan of the 2.26″ risers, but that’s just me.
Magnifier
If you are using a magnifier with your red dot, eye relief becomes a critical consideration.
Eye relief is the distance between your eye and the lens that allows for a clear sight picture.
The magnifier should be positioned to enable a natural head position while aiming, ensuring you don’t need to strain or move excessively to achieve a clear view. If you find yourself struggling to find the dot when looking through the magnifier or see a lot of “scope shadow”, try moving your magnifier, either toward the stock or towards the red dot.
I keep my Vortex x3 all the way to the back of the rifle (the rear iron sight had to be removed).
Practicing transitions between the magnifier and red dot can help confirm the placement is ergonomic and functional.
Sling
A properly mounted sling enhances weapon retention, transitions, and overall handling.
Attach the front end of the sling near the barrel nut or forward on the handguard, while the rear end should be secured at the stock or buffer tube.
Two-point slings offer versatility, allowing for better control and stability, while single-point slings are more suited for close-quarters use. I always advise using a two point sling unless doing some very specific work.
It’s important to test various positions to ensure the sling does not interfere with your support hand, optics, or other accessories. Sling placement is probably the thing you play around with the most until you find a setup that works for you.
Weapon light
The light should be mounted on the handguard at either the 10 o’clock position or 2 o’clock to allow easy activation with your thumb.
I use a pressure switch on my rifle so I keep mine at 2 o’clock. Even if I wasn’t using a pressure switch, I would still keep it at 2 o’clock, as I use a C-clamp grip with my support hand which allows my thumb to activate the light.
Ideally, the light’s placement should not obstruct your grip or create unnecessary shadows.
Handgrip
Your grip and handstop placement can significantly affect control and recoil management.
Vertical grips, angled grips, or handstops should be positioned on the handguard to support your natural shooting stance.
Experiment with different placements to find the most comfortable and effective position for maintaining control and ensuring quick target transitions.
Also, experiment with different styles of hangrips until you find the perfect one for you.
Conclusion
To conclude, everything mentioned here is just guidelines.
Personalization and testing are key to refining your setup. No two shooters are the same, so tailoring your rifle to your specific needs and preferences is crucial.
Train and dry fire regularly, and you will identify areas for improvement and make small adjustments as necessary.
As always, if you have any questions or comments, leave them below or ping me on X.